3 Come & Knock on Our Door

>> Tuesday, April 6, 2010

Good news, friends! We’ve added a new House Tour tab to the link bar at the top of our blog for your viewing convenience.

image 


We realized our before & after projects were scattered all over this blog of ours, so why not make life simple and consolidate. It’s a work in progress so be sure check back in with the House Tour for updated photos of our casa.

-Cara

Read more...

6 Q & A: Column Talk

>> Monday, April 5, 2010

Libby recently sent us a message on Facebook asking about the columns on our front porch…


I saw on your blog awhile back that you redid your columns. I have similar columns on my front porch and have thought about doing the same thing. How did you do yours? Now that the weather is nice, it's time to start outdoor projects. Your new house looks great by the way.


…Thanks Libby and good question!

Now before we go any further, I have to admit, we did not build these columns ourselves. We had the columns crafted during our crazy month of packing, painting, refinishing floors, and moving, but I did do some super sleuth stalking as the columns went up, so hopefully my input will help.

Here is our porch pre-columns…

image

Nothing special. We needed to spruce up our curb appeal pronto. Enter our handy friend who we’ll call “Joe” for the sake of this story.

Joe was to build us 4 square columns: 2 on the front porch & 2 in the carport.

The plan was to build the wooden columns around the existing rot iron columns which would remain as the support for the porch.


First, a little trim was needed to remove the excess rot iron…

image 
Next up, our friend Joe basically built a box around the rot iron. Be sure to use a wood that can stand up to weather demands and keep a level on hand to make sure your columns are nice and straight. Add trim as desired.


This is where we said farewell to Joe and continued on with this project ourselves. First on our list was priming these bad boys. We turned to Kilz exterior oil based primer.

After a couple solid coats of primer, we were ready to caulk the cracks and screw holes. Click here to see the post outlining this adventure…

image 
image
Once the caulking was dry, all that was needed was a couple coats of exterior paint. We went with Parchment White by Behr.

Finished out with a few new house numbers and we were in business!
 IMG_5199 image 


-Cara

Read more...

5 So Long Sea Life

>> Sunday, April 4, 2010

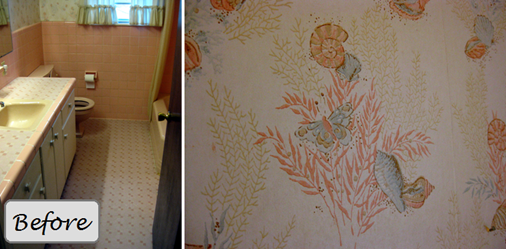
The wallpaper gods and I have made our peace. I don’t know what I did or said to put me back in their good graces, but boy was removing the wallpaper in the pink hall bath a breeze! Compared to our last attempt at wallpaper removal, this task was a little slice of heaven.

image


Eric ran off with the camera to do important Realtor things, but no worries, the video camera was on hand to capture our bathroom walls in decorating limbo: after wallpaper, before priming & painting. Pay no mind to the bad hair day in the mirror…


I have to admit, we’ve done a bit more than just paint, so check back soon to see how our pink bath is shaping up—and yes, it’s still pink.

-Cara

Read more...

2 Post Of Note: Casa Sugar

>> Saturday, April 3, 2010

Check out how one Casa Sugar reader created her own West Elm knock off for just $15 bucks!…

image


-Cara

Read more...

3 From Where I Sit

>> Friday, April 2, 2010

From where I sit as I type away on my laptop, which is right here…

image 
From our dining room window, I see happy neighbors pushing strollers, joggers prepping for swimsuit season and dog walkers spending time with their canine loves. I feel a bit like the nosy neighbor and I love it.

But yesterday’s passersby took the cake.

I may or may not have run to the window with my camera in the event they decided to cruise by a second time. No such luck. This all I have for you…

IMG_5113


Father and son taking a joy ride with junior hanging onto the outside of the truck and dad holding onto him while driving. Oh, Arkansas. Really?

-Cara

Read more...

9 Gran Gear #3: Key to My Deal Loving Heart

Cooking is not my cup of tea. I sometimes try it and even sometimes enjoy it, but in no way, shape or form am I eager to hit the kitchen on a daily basis—alright, let’s be honest here, it’s really doing the dishes that makes my lip curl.

As a result, this trifle bowl has remained empty since it was given to us at a bridal shower many moons ago. Oh, yikes. I hope the person who gave this to us isn’t reading along. Oh well, sometimes the truth hurts. But rest assured, kind gift giver, this trifle bowl is now serving a purpose…

IMG_5089

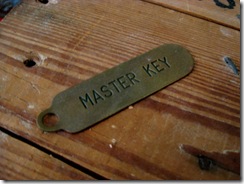
Another fantastic Gran find was this chest of old keys. Dozens of old keys. Dozens of old keys that would make for killer vase filler trifle bowl filler…

IMG_5092

Several of the keys even had handy identifier tags and I quickly learned that these friends were once the gatekeepers on a long lost boat.  As fun a discovery as it was, I wasn’t surprised by this revelation. You see, my Grandad was a bit of a nautical nut. If it had to do with the sea, he was onboard.

IMG_5096

Just my luck, there was enough room in my trifle bowl for each and every key…

IMG_5101IMG_5100

Well, I may have left one out…

IMG_5094

IMG_5099


-Cara

Read more...

8 Gran Gear #2: Flower Power

>> Thursday, April 1, 2010

I’ve been eyeballing this set of floral prints from Pottery Barn for quite some time, but with so many home projects consuming the time (and pocketbooks) of we Wilkersons, these guys have been simmering on the backburner…
image 
…until now! Look what Gran & I found during our recent scavenging adventure…

IMG_5085
…it’s the holy grail. The holy grail filled with hundreds upon hundreds of 8x11 wildflower prints…
 IMG_5078 IMG_5080IMG_5082 IMG_5084


I feel some serious framing coming on.

-Cara

Read more...

Related Posts with Thumbnails

  © Blogger template Simple n' Sweet by Ourblogtemplates.com 2009

Back to TOP