Showing posts with label Master Bath Remodel. Show all posts

13 ‘Bout Dang Time: DIY Shower Curtain

>> Monday, April 23, 2012

I’m super pumped to celebrate the 3 year blogiversary of this little blog of mine! Time flies and with nearly 1000 post written (holy smokes I need to get out more) I love being able to look back on all of my adventures—and misadventures—in living the home life. I have a special birthday blog post in the works for later this week, but in the meantime, I’ll just keep chugging along as usual. After 3 years of DIY, I think we’re all on the same page that when it comes to the home life, things don’t just fix themselves.

Remember the master bath remodel I wrapped up last fall? Not to get too braggy, but it’s pretty stinkin’ fab. DIY floating wood vanity. Linen nook. Pristine, white tile. It’s my heaven…but I have to be honest with you now that we are 3 year old friends: I haven’t once taken a shower in this glistening dream come true of mine. Not once.


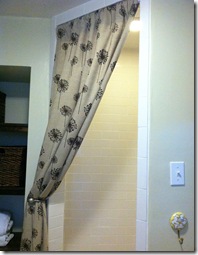
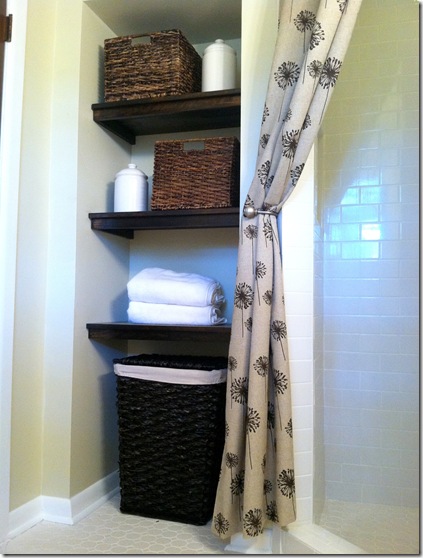
When the bathroom was almost a wrap, I whipped up a super cute (and super simple) shower curtain by hemming both ends of a few yards of fabric with a sewing machine and hanging across the top of the shower with a tension rod…

Master Bath Remodel_after22IMG_4102

With so many other little to-dos on the list and then the holidays and then a kitchen reno, I never quite got around to hanging a shower curtain liner…until now. After all, I can think of no better way to celebrate a blogiversary than to scrub-a-dub paint out of my hair in a shiny new shower.

My shower is extra tall (like owner, like shower), so I had to splurge on an extra long shower curtain. No biggie. Bed Bath & Beyond had tons.


IMG_4105

Since the liner would not be nearly as heavy as all of the fabric I used for the curtain, I used a smaller tension rod.

IMG_4094

A look-see from the inside…

IMG_4097IMG_4098IMG_4096IMG_4100

I guess if my OCD ever gets the best of me and I can’t stand seeing the liner from the outside, I could always install a hook on the inside to hold it back…

IMG_4101

But for now, I’m a happy camper. A clean happy camper.

IMG_4103

clip_image002

Read more...

12 Master Bath: DIY Floating Vanity

>> Wednesday, October 5, 2011

In the normal scope of LTHL posts, DIY means just that: do-it-yourself…but for the purposes of this post, let’s loosen the strings on those guidelines a bit and think of DIY as do-it-yourself…with extensive help from an architect dad.

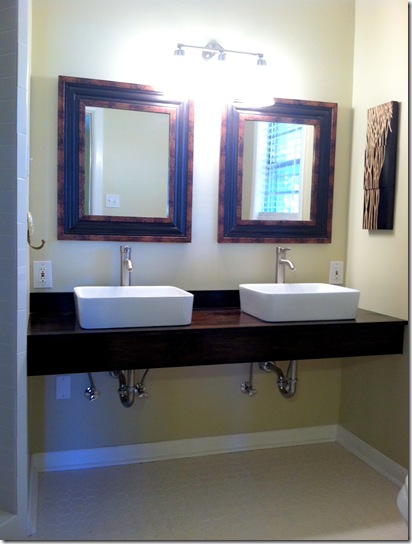
From the get-go, the master plan for this section my bathroom was to completely demo the original nastiness and replace with a fabulous floating wood vanity complete with two vessel sinks…

IMG_5519IMG_5566
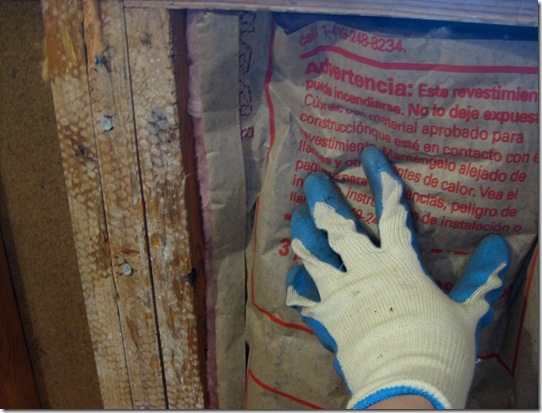
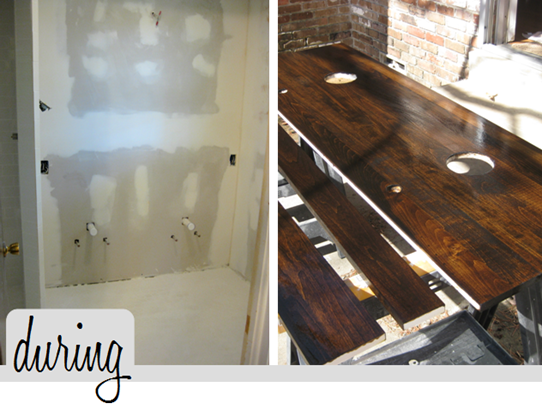
So once demo was complete, phase one of plumbing was a wrap and tile, drywall, new wall insulation and paint were checked off of the to-do list, in came Dad to begin framing the floating vanity.

IMG_5564IMG_5596IMG_5612IMG_5731IMG_7669 
Now I have to be honest, this DIY was broken down into two parts. Part 1 of which I had little to nothing to do with. My fabulous father, on the other hand, was a busy bee…

IMG_7700IMG_7724IMG_7744

Once the frame was knocked out, Dad measured and cut the vanity top and side apron for me to stain and seal before he secured them in place…

IMG_8029IMG_8035IMG_8039

Part 1 complete! Note: the sinks & faucets aren’t actually attached in the above photo, I just got a bit over zealous and wanted to daydream about the end result.

Now on to part 2: staining and sealing the vanity top and apron. This is where I took over and got down to serious business. Using Minwax oil-based wood stain in dark walnut, a few coats took this soon-to-be vanity to a rich shade of lovely.

IMG_7787IMG_8289


Followed by three solid coats of Waterlox, a fabulous product for protecting wood from continuous exposure to water.

IMG_8295

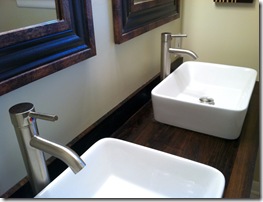
Once stained, sealed and secured in place by Dad, the plumber came back out to put the finishing touches on my dream come true…


Master Bath Remodel_after11Master Bath Remodel_after20 
clip_image002

Read more...

2 History Lesson: Master Bath

>> Tuesday, October 4, 2011

Before we break into the how-tos (and how-not-tos) that make up my master bath remodel, let’s wrap up the entire project with a speedy summary of where I found what and when…

image

Master Bath Remodel_after21

Master Bath Remodel_after14


#1…DIY (with much help from my fabulous father) floating wood vanity. We’ll get into the nitty gritty of exactly how we pulled this one off a little later in the week.

#2…Vessel sinks, faucets and vanity light fixture straight from Amazon.com. I’m not sure what kind of black magic Amazon is into but all I know is that I ordered my light fixture at 5:30 in the evening (standard shipping, mind you) and it arrived on my doorstep by 11:30 the next morning. That’s more than a minor miracle.

#3…In stock white octagon floor tile and white subway shower tile from Home Depot. Load it up, take it home, get to work.

#4…DIY baseboard and quarter round. My first attempt at trim and I’m patting myself on the back and counting all of the pennies I saved by knocking this one out on my own…and it looks pretty stinkin’ fabulous, if I do say so myself.

#5…Topped off with a couple of mirrors I picked up a few months back at a going out of business sales for a local frame shop and carved wood wall art from Target that I’ve had for years.


Now for the shower and linen nook…

image

image image


#1…Wall color: Rice Grain by Sherwin-Williams. Love my friends at SW and this is the perfect neutral with a hint of green…without out getting too green.

#2…Accessories: baskets from Target, canisters from Mom last Christmas, and hamper from Burlington Coat Factory. Their ads don’t lie. They really are more than great coats, y’all!

#3…DIY shower curtain. Again we’ll discuss the how-to later in the week.

#4…Curtain holdback from Walmart to keep the pretty white shower tile in plain view.

#5…Hooks from Anthropologie double as the perfect perch for hand towels.


That’s it! Join me back here tomorrow as I recap a DIY project…or two.


clip_image002

Read more...

10 Before and After: Master Bath Reveal

>> Monday, October 3, 2011

No messing around. Let’s jump right into the good stuff. Of course we have to begin by revisiting the before photos of my master bath the day I took ownership of this little diamond in the rough I call my construction site…

imageimageimage

Other than the simple truth that this master bath was just plain ugly, it wasn’t even functional. With the plumbing leaking underneath the toilet, a shower head so low I couldn’t have even fit underneath in 6th grade and every homeowner’s worst bathroom nightmare, a leaky shower pan complete with rotted subfloor, I had no choice but to gut this sucker to the studs and start from scratch. But no worries, my friends. I had a highly sophisticated plan in mind for what I wanted this space to ultimately look like.

IMG_5566IMG_5567


Accurate measurements and well thought out renderings are clearly for the birds. Sharpie pens and copy paper are really where true genius takes shape…one raised shower head, white tile, open linen nook, double floating vanity, neutral dream of a bathroom coming up!

Time to gut…

image 


Re-plumb and re-tile…(Note: at this point in the process, DIY was virtually nonexistent and my role consisted of carrying around a checkbook and breathing down the necks of several hired professionals)…

image


Then came the linen nook…

image

…and a DIY (with much fatherly assistance) floating vanity for double vessel sinks…

image

Finally, topped off with a little paint, trim and accessories. This master bath is a wrap! 

image Master Bath Remodel_after11Master Bath Remodel_after20

Master Bath Remodel_after14

Master Bath Remodel_after12

Master Bath Remodel_after8

Master Bath Remodel_after19

Master Bath Remodel_after2

Master Bath Remodel_after22

Master Bath Remodel_after17

Master Bath Remodel_after18


Pretty dang delicious and exactly what I had in mind. Sharpie sketch wins.


clip_image002

Read more...
Related Posts with Thumbnails

  © Blogger template Simple n' Sweet by Ourblogtemplates.com 2009

Back to TOP