Showing posts with label Laundry Room. Show all posts

0 Kitchen Progress: Baby Steps

>> Tuesday, January 22, 2013


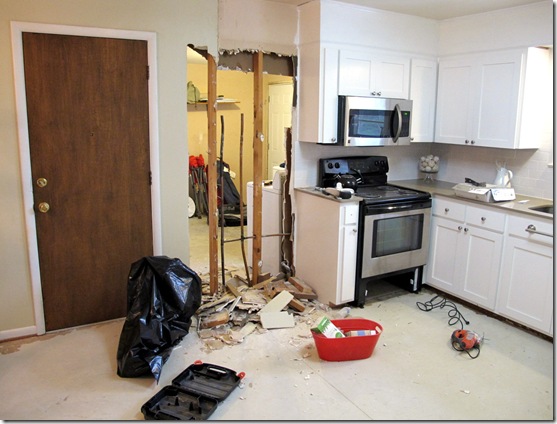
Happy Tuesday, blog buddies! Nothing terribly interesting is happen around the old construction site other than the eternal saga of piecing my kitchen back together after knocking an enormous hole in the wall.

IMG_6291
Just a few door hanging, drywall patching, trim nailing and paint priming steps later, we’re inching our way to the finish line.

Photo Jan 20, 7 14 59 PM 
Cara Signature

Read more...

0 Door Prep Talk

>> Tuesday, January 8, 2013

Oh, boy was it a weekend. Or as the boyfriend referred to it, an I-can’t-wait-to-go-back-to-work-on-Monday-to-get-some-rest kind of weekend. More on what a trooper he is later.


Last I left you, the old linoleum floors were freshly removed from the construction site

IMG_6275 
But prep work was far from behind us. Before we could begin installing the new floor, the long awaited doorway connecting the kitchen to the laundry room had to be demo-ed. See that frighteningly patchy eye sore on the wall next to the range?

IMG_4080


So long sheetrock.

IMG_6278

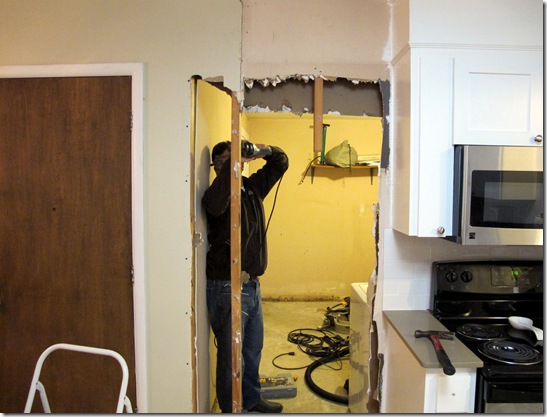
Our Friday night was dedicated to clearing enough of an opening for a new door and rebuilding the door frame to size. Once the sheetrock was removed (true confession, I got a little hammer happy and took out more than I should have, but nothing that couldn’t be patched later), the exposed studs were sliced and diced.

Note to self: Give the boy a saw and he’s onboard from just about any project.

IMG_6281IMG_6287
And new 2x4s were carefully secured in their proper places, with a lot of “wait a minute while I think about this for a second” and a little of “are we sure it needs to move 1/4 of an inch to the left?” Also known as the DIY language of love.

IMG_6291
Cara Signature

Read more...

0 Door Bore & Winter Galore

>> Wednesday, December 19, 2012

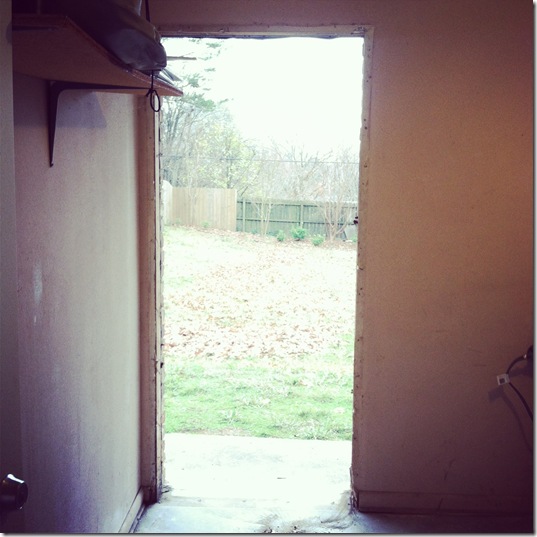
Are ya’ll tired of hearing about laundry room door yet? I sure am. Unfortunately that’s all that has been going on in my construction site as of late AND with installing new doors being such an all-hands-on-deck-so-that-fingers-and-toes-stay-intact project, there have been little opportunities to take progress pics. In fact, all have for you today from my world of rehabbing is what post demo/pre install of laundry room door #2 looks like.

Photo Dec 19, 10 51 59 AM

Fortunately we were able to install the door before dark fell/backyard creatures worked their way inside.

Now on to more important things like wintertime inspiration pics…

Winter Wonderland
winter tones
winter white
winter!
winter picnic
winter, lovely winter.
Image sources: 1 | 2 | 3 | 4 | 5 | 6


Cara Signature

Read more...

5 A before & after of epic proportions…said no one ever but me

>> Thursday, December 13, 2012

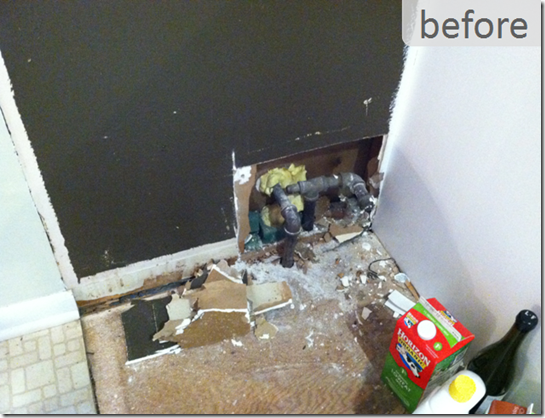
Before & afters are my jam and I am stoked for today’s before & after pics. Living room overhauls and rehabbed nightstands have nothing on the beauty of the before & after I am about to throw your way?…Now that you are properly amped enough for a complete let down when I yell PSYCH! let’s get to perhaps the most deceivingly exciting before & after of my DIY lifetime…

image
image 
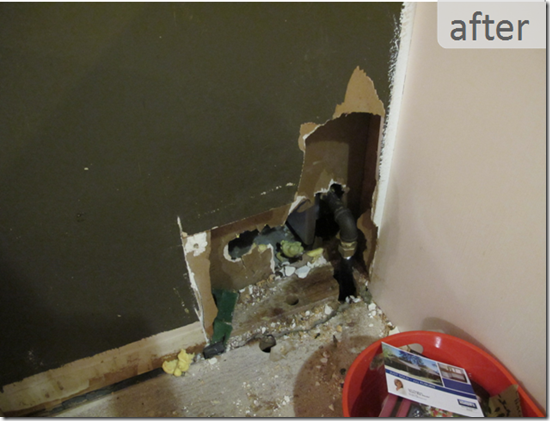
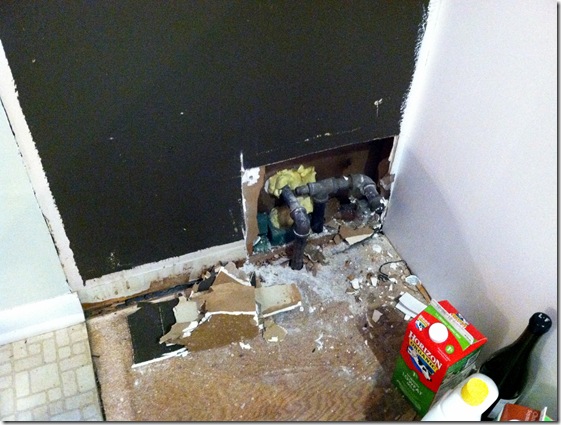
Now that this little stinker of a gas pipe has been moved no more than 6 inches to the right, cutting a doorway connecting my laundry room to the kitchen can become a reality. Isn’t that AMAZING?!

Cara Signature

Read more...

2 Door Install Date Night

>> Monday, December 3, 2012

This weekend Michael and I celebrated the one year mark since our first date and also one month of living under the same roof, so of course we had to celebrate. What better way to honor the occasion than with dinner, a bottle of wine and a two-man DIY project? Nothing says ‘Happy Anniversary’ to my heart like ripping out a 50 year old laundry room door and installing a brand spanking new one.

With the laundry room reno underway and the hot water heater relocated to allow a future doorway connecting the kitchen to the laundry room, the next to-do on the list was to install new exterior doors to the laundry room.

Note: Don’t psych yourself up for sweet step-by-step how-to pictures since the majority of this DIY was spent making sure the door didn’t fall and smash one of us which doesn’t lend itself well to snapping progress pics.

This sad little door was well past its prime and the first step was to remove the door from its hinges and tear out the entire frame with our exceptional crowbar technique.

Laundry Before_10

(This is where I would normally insert a demo pic, but Michael and I must have been more concerned about keeping the soles of our feet free of rusty nails.)

Next, we were off to pick up three new exterior doors. Two for the laundry room and one for the kitchen entrance from the carport.

Photo Dec 01, 2 10 40 PMIMG_6144
The good news is we only had one hiccup with this install. The pre-fab trim around the new door frame was one inch too wide to fit in the demo-ed opening.

image

Using our trusty crowbar, we carefully removed the trim so that the door would fit.


IMG_6147

Once the door was in place, we literally just followed the directions included with the door to secure it into place.

s

We still have to fill the small gaps around the frame with insulation and finish out with trim and paint, but how’s that for romance? A safe and secure laundry room door for two.


Cara Signature

Read more...

1 Water Heater Wasteland

>> Friday, November 16, 2012

Some people get nervous at the sound of jigsaws tearing into drywall. This girl? This girl gets giddy.

Photo Nov 16, 11 58 29 AMPhoto Nov 16, 11 56 43 AM


So long old friend. We’ve been together way too long and quite frankly, I’m out of your league. Time for an upgrade.

Cara Signature

Read more...

1 ‘Bout Time: The DIY Stars Align

>> Thursday, November 8, 2012

Reasons why it’s finally time to get started on the great kitchen-laundry room merger of 2012…

1. Removing the wall separating the two rooms has been on my to-do list since spring.

2. My live-in boyfriend is the wonderful type of freak of nature that loves to do laundry and anything I can do to encourage that behavior (including knocking down walls) must be done.

3. Aforementioned boyfriend’s brother is a plumber who has already begun cutting holes in my kitchen wall. Let the reno begin.


Photo Nov 08, 3 47 14 PMPhoto Nov 08, 3 47 00 PMPhoto Nov 08, 3 50 56 PM


Cara Signature 


Don’t forget! Today is the last day to enter to win the P. Allen Smith holiday wreath. Click the banner below to enter…

banner_p allen giveaway

Read more...

1 Sweet Dreams

>> Thursday, April 19, 2012

I know this blog has been a little heavy in the yuck department this week (with the moldy banana post and rotting insect carcasses) so let’s dedicate today to focusing on the pretty.

Nothing revs me up for kicking off a home project more than daydreaming of what the final product will look like. Since my soon-to-be-oh-so-fab laundry room will not only serve as place for washing clothes but also as June Bug’s puppy palace, I’ve had a ton of fun with Pinterest and Google Images lately.

Let’s take today to fantasize…

Shelves with baskets will definitely be working their way into the mix…

image

I feel good about wallpaper in two very specific areas of the house: half baths and laundry rooms. Maybe, I should bring a fun print into my new laundry room—not this print. Definitely a different print…

image

Love the framed Whirlpool and Tide ads from long, long ago—even though my washer is Maytag and I’m waaaaay too cheap to buy something fancy like Tide.

image

June loves an ikat print. Like mother like daughter…

image

But really it doesn’t get any better than this DIY goodness (or just pick one up on Etsy)…

image


Too cute. June needs one of these personalized puppy canvases from Red Envelope ASAP. I wonder if they can whip one up for a schnauzer-and-some-kind-of-terrier-but-who-really-knows-which-one mix?…

image


Oh, dear. The wheels are starting to crank and the demo itch is creeping back up on me. I’m determined to finish out this week with zero signs of construction debris, but next week, we’ll talk.

clip_image002

Read more...

4 The Ugly Truth

>> Wednesday, April 18, 2012

This post is about to get real, y’all. Really real. Normally I’m 100% candid with you on the progress of my house. The good. The bad. The ugly cluttered mess that tends to take over your life when you turn your house into a giant construction site…but there is one room in my house that I hardly ever give you a glimpse of out of pure embarrassment and fear that you’ll leave me for good: my laundry room.

With the actual kitchen portion of my great Kitchen/Laundry Room Remodel of 2012 coming to a close, I have no choice but to share the laundry room before pictures with you. I’m praying it’s been at least an hour since you’ve had lunch. Let’s do this.


Currently in order to enter my laundry room, you have to go out my kitchen door, into the carport and then into a separate door to my laundry room. If you think you’d be able to sneak into the laundry room in a bathrobe, wet hair and face mask without the neighbors catching you, from personal experience I can tell you that your assumption would be incorrect. Hence the need for a doorway connecting the kitchen to the laundry room from the inside of the house. Which is just what I have planned and you’ve seen me describe a hundred times on this very blog…from the viewpoint of the kitchen.

At Home_Apr 2012_15

Now let’s take a look at the viewpoint from the laundry room. Here we go. The laundry room in its current state.

Laundry Before_5Laundry Before_1Laundry Before_6

What’s that? Not too bad, you say? Let’s dig a little deeper. Aside from the obvious clutter and desperate need for a few gallons of paint, there is just one miserable saggy little shelf serving as the only storage space…

Laundry Before_8

A filthy floor covered in dirt and leaves. Trust me when I say that dropping clean underwear while unloading the dryer is not the highlight of my day.


 Laundry Before_13

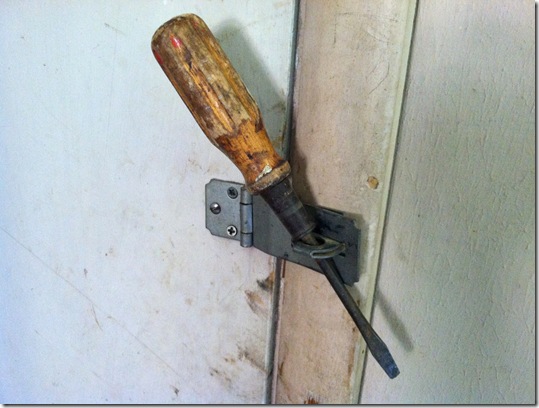
A flathead screwdriver circa 1932 serving as the security system…
Laundry Before_9


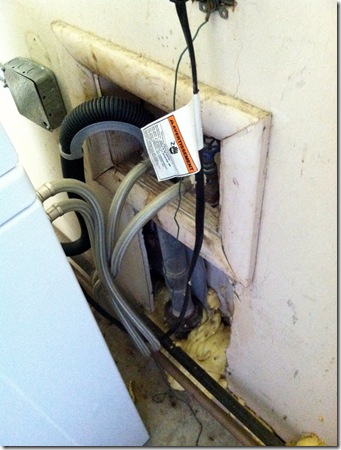
A tangle of water hoses & electrical cords topped off with a sweet DIY foam insulation hack job…
Laundry Before_11
And a family of spiders that don’t know how to throw away leftovers.

Laundry Before_12

Now what was that you were saying?


clip_image002

Read more...
Related Posts with Thumbnails

  © Blogger template Simple n' Sweet by Ourblogtemplates.com 2009

Back to TOP