Showing posts with label DIY Bib Necklace. Show all posts

2 Going Global…Or Just Statewide

>> Wednesday, May 18, 2011

Some people just know how to make a girl blush, and my pals at At Home in Arkansas magazine are definitely masters of the craft.

I’m super excited to announce that I’ll be an ongoing contributing blogger for my wonderful friends at At Home. My monthly posts will be centered around Before & After projects, and  they even gave me a fancy banner with my name on it. Now if that doesn’t scream official, I just don’t know what does…

image
image

At Home readers, you are in for a treat! Live the Home Life blogger and DIY extraordinaire Cara Wilkerson is now a monthly fixture on the At Home in Arkansas blog, sharing her tips and tricks-of-the-trade for bringing new life to old furnishings! We were blown away by Cara’s first post (she makes refurbishing this ottoman look so easy!), and we cannot wait to see what else she has in store. Welcome, Cara!

image

Click here to head on over to At Home’s blog and check out my first post where this shabby ottoman was given a simple facelift…for the second time.

Happy Tuesday, y’all!

clip_image002

Read more...

2 DIY Bib Necklace How-To…and How-Not-To: The Finale

>> Tuesday, May 11, 2010

True confession. I gave up on this flower pattern…

image


The fabric I used wouldn’t stop unraveling around the edges, and instead of stressing over how to make it work, I moved on with the bounty of flowers I’d already crafted over the past couple of weeks. You know what that means: Time to assemble our DIY bib necklace!

(Missed out on parts 1-4? Click here for the crash course.)


Here we go. First, take all of the flowers and play with an arrangement until you find one that suits you…
 IMG_5587 IMG_5708 
Find a thick piece of fabric (I used a scrap piece of fabric left over from this DIY upholstery project) and place your necklace arrangement on the fabric to make sure it fits…

IMG_5710 
Sew each flower one-by-one to the fabric. Don’t worry if the back doesn’t look too hot…

image
image
image
image

Once all of your flowers are sewn, carefully cut around the flowers so that the fabric is not visible from the front…

IMG_5719 IMG_5720 
Lovely! Now just attach your chain with a few stitches, and it’s a wrap…

IMG_5723 IMG_5725
Not very glamorous from the back, I know, but this bib necklace sure is a gem from the front, if I do say so myself…

IMG_5730 
Who’s our model, you ask? Why, that’s just an old childhood friend. You’ll get to know her a bit better once we start spilling our guts about our shabby-to-earth-friendly-chic guest bedroom. Stay tuned!

-Cara

Read more...

1 DIY Bib Necklace How-To…and How-Not-To: Part 4

>> Saturday, May 1, 2010

Playing catch up? No worries. Here is what you missed…

DIY Bib Necklace: Part 1
DIY Bib Necklace: Part 2
DIY Bib Necklace: Part 3

With just two flower varieties left to make, let’s focus on this one today…

Thanks again to Oliver for volunteering to serve as our model.


image

First, trace & cut out five circles. I went with circles about the size of the top of a water glass….

IMG_5579 


Next, sew all five circles just as we did to make the flowers in Part 1

IMG_5580

Once secure, turn each flower on its side and flatten to form the shape of a petal. Then, string the petals together on a piece of tread…

IMG_5581

IMG_5584

  
Tie the two ends of your thread together to form the shape of a flower…

IMG_5585 
Sew a button or spiral flower from Part 3 to the center to cover exposed thread…

IMG_5586
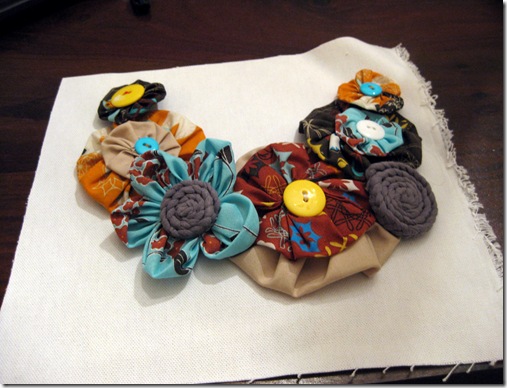
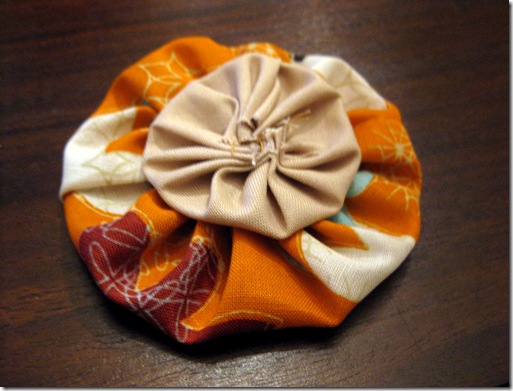
Tada! This one’s a wrap…

IMG_5587
Note to the seamstress (that’s you!): No need to include all of the different types of flowers in your necklace—unless you’re just feeling super crafty. Found one or two flower designs that you have really gotten the hang of? You can absolutely create a beautiful masterpiece using just a couple of different types of flowers. We’re just laying out all of the options before we assemble our necklace. Happy crafting!

-Cara

Read more...

1 DIY Bib Necklace How-To…and How-Not-To: Part 3

>> Wednesday, April 28, 2010

In case you missed our progress so far (and you really haven’t missed all that much) and feel like playing catch up, below are the links to Part 1 & Part 2 posts…

DIY Bib Necklace: Part 1
DIY Bib Necklace: Part 2


Moving on to the next flower, hard to tell from the photo below but take a closer look in the video above to get a good feel for this little guy.

image 
In need of more fabric choices at 10:00 at night, I turned to my own closet for a little inspiration…

IMG_5503 
This shirt will do! No longer needed by yours truly, it was just the color I was looking for…

IMG_5504 
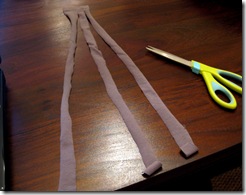
First, cut a long strip (about 18” long and 3” wide), and then cut into 1” sections so that you have 3 strips…

IMG_5506

IMG_5507


Start braiding..

IMG_5508 IMG_5509


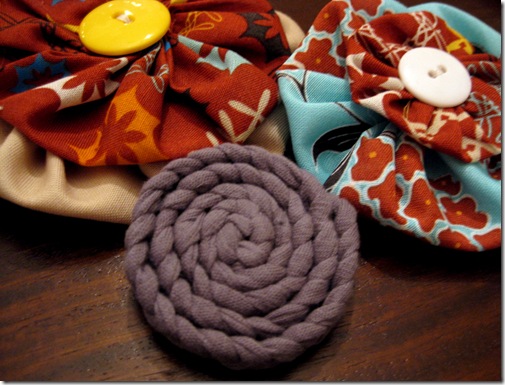
Once you have the entire length braided, roll the braid into its self and stop to secure the rows to each other along the way…

IMG_5510 IMG_5513


Secure the end of the braid to the underside of your new curly flower and call it a day!

IMG_5516

IMG_5517


-Cara

Read more...

1 DIY Bib Necklace How-To…and How-Not-To: Part 2

>> Monday, April 26, 2010

Before we move on to the flowers-that-look-more-tricky-but-really-aren’t, l

et’s wrap up the buds we started yesterday…


 image
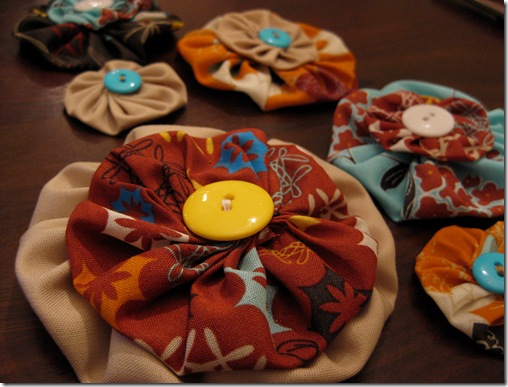
With a wide variety of pretties to pair up, grab a couple in different sizes, stack and sew together.

IMG_5451IMG_5456

Next, sew a button to the center of your new blossom…

IMG_5454IMG_5458

..and keep going!

IMG_5463      

Not too painful right? We’ll be back soon with the how-to for these guys…

image


-Cara

Read more...

5 DIY Bib Necklace How-To…and How-Not-To: Part 1

>> Sunday, April 25, 2010

After crafty-cousin-in-law Katie breezed through a quick how-to of making her bib necklace, I tried to do my best to keep up, but somehow all I remembered of our conversation was: …super easy…cut circles…basic running stick…pull thread…

Luckily it seems that those 3 steps were really all I needed to get started: cutting circles, running stitch (don’t worry. I’ll explain this one for those of you who also have no clue what this means) and pulling thread. Now let’s get crackin!


Supply List 

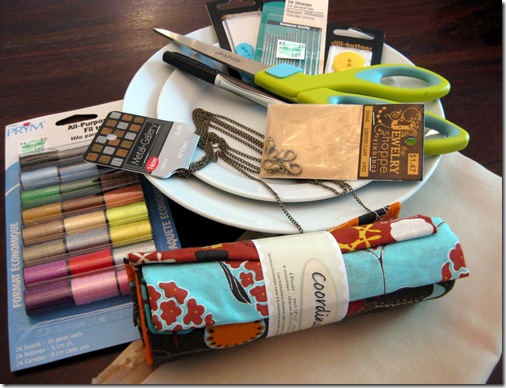
Thank goodness for the dear sweet old souls manning the sewing department at Hobby Lobby. One helpful vest-clad employee in particular came to my rescue. Here’s what I walked away with…

- Fabric scraps (Amazing! Already bundled & color coordinated)
- Sewing needles
- Thread
- Chain (head on over to the jewelry section for that)
- Necklace clasp


- Buttons (grab a few in different colors & sizes)
- Fabric scissors

Note: I am sure I’m missing a few items that I’ll find that I need in the future, so I’ll keep you posted on what I neglected to include in the original supply list.

IMG_5435IMG_5438

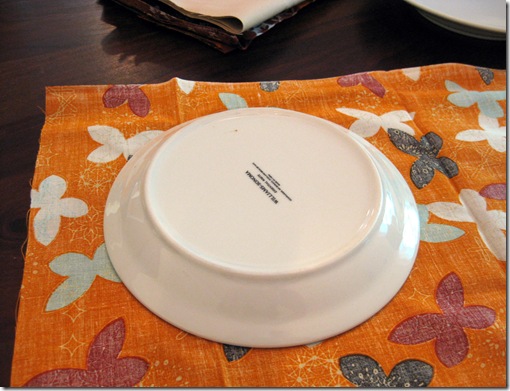
Step #1: Cut Circles

Easy enough. I gathered a few household items in various sizes to serve as my guides. To be more specific: a bread plate, dessert plate and water glass. Then, just trace & cut out your circle.

IMG_5440IMG_5441IMG_5442 
Success! On to the next step…

Step 2: Running Stitch

Running stitch means nothing to you? Welcome aboard. Click here to see a detailed description, but basically a running stitch is the kindergarten version of sewing. That is good for us. Very good.

Sew along the entire outside of the circle…

IMG_5444IMG_5445

Step 3: Pull Thread

Once you arrive back where you started sewing, simply pull the thread so that the ends of the circle bunch and meet in the middle. You may have to guide the fabric a bit to form the right shape of the flower. Then, just tie the two ends of the thread together to make sure this little budding blossom stays put.

IMG_5448       
That’s it! See how easy? Katie has been on point so far.

Keep whipping up a few more flowers like this in different sizes and fabrics. We’ll meet back here soon for Part 2. Happy sewing!

-Cara

Read more...
Related Posts with Thumbnails

  © Blogger template Simple n' Sweet by Ourblogtemplates.com 2009

Back to TOP