5 LTHL Link Love

>> Thursday, May 5, 2011

Time to send a little love to all of the wonderful bloggers out there who have linked to Live the Home Life. You fine folks are simply fabulous and deserve way more than a gigantic thank you from this girl.

A Touch of Arkansas
AJW Design Co
At Home in Arkansas
Bellatina Creations
Brixton Nole
Bubbles and Money
Building Moxie
Cara Beth Photography
Casa Sugar
Charlotte John Real Estate Co.
Custard By Design
Dabe to Dream
Details Weddings & Events
East Goes West
eHow
Five Little Rules
From the Front Porch
Frugal with a Flourish
Home Decor News
Home Sweet Home
I design, you DIY…e-decorating
Jessica’s Journey
Keeping Up with the Joneses
Life Lessons
Live the Life You Love
Lovely Tonight
Modern Maizy
Oh The Place I Want To Go
Our Happy Family
Quaint Oaks
Rachael Jones’ Blog
Rambles with Reese
Show Home Staging & Design
Simple Tips for Life
Take Life with a Grain of Chocolate
Tearing Up Houses
That’s What She Said
The Buies
The Cape on the Corner
The Dooses
The Deacons
The Divine Mrs. EM
The Flipping Couple
The Good Life
The Hopper House
The Jones Family
The Lowe Down
The Married Life Diaries
The McNulty Family
The Muddy Truth
The Rich Hard Life & Sons
Two Dogs & a House
Two Poms and a House
UAMesSing It Up


If you happen to find yourself in need of a little workday procrastination, be sure to stop by these wonderful sites and see what my buddies have been up to. As always, if you’ve been so sweet as to include this little blog-o-mine on your own site and don’t see your name on the list, for goodness sakes, click here to email me and let me know!

AND a super enormous thank you to the wonderful ladies at At Home in Arkansas for selecting me for this month’s At Home With feature. I’m still blushing… 

At Home With Cara Wilkerson 
Click here, to visit At Home in Arkansas’ fabulous website and (if you are really bored) read through my interview questions.

Happy Thursday, y’all!

clip_image002

Read more...

0 Herb Today, Grown Tomorrow

>> Wednesday, May 4, 2011

From time to time I do head out into the yard and attempt to exercise my brown thumb. Especially when it’s a sunny 72 degrees and I just can’t stand the thought of being inside. Last spring I was pretty stinkin’ proud of myself for my novice attempt at an herb garden, but of course, as the weeks went by, my around-the-house-ADD left this patch of dirt more than slightly neglected.

Sadly, there weren’t many survivors. Dill, parsley, basil and cilantro just couldn’t handle my here’s a little dirt, a smidge of sunshine and water when-I-remember-you’re-still-out-there mentality towards gardening.

But not my rosemary…


image 
Oh, no. This trooper held on tight during the winter months and seemed to triple in size with all of the rain we’ve had thrown upon us in the last few weeks. Out of nowhere—and with zero help from yours truly—BAM! This friend turned into serious shrubbery…

IMG_8792IMG_8791 
My poor little kitty friend is suffocating underneath all the herb goodness. He’ll learn to love it. Heaven knows I’m not planting another bush for him to keep company.

clip_image002

Read more...

4 How-To: Arm Chair Rehab, Part 3

>> Tuesday, May 3, 2011

Here we go! Back to the (not so much of a) how-to for my most recent furniture rehab. Let’s rewind to where I last left you.

This guy, as you see below in his originally sad little state…

Arm Chair_before


…had been stripped…

IMG_8455


…and stuffed…

IMG_8479

…and then I took a two week breather to find the perfect fabric. Sadly everything I loved exceeded my budget by more than a penny or two—remember, I prefer to hang out on the frugal side of life. Especially when I could very well screw up this project entirely with my let’s-wing-it-and-see-what-happens attitude.

Finally while digging through bolts upon bolts of clearance fabric, I stumbled upon the perfect find for a measly $6 a yard. Nailed it! Four yards later I was home and ready to do some serious damage with a pair of scissors and a staple gun.

IMG_8743

Now here comes the part where a few of you are going to most definitely be very disappointed with me. Remember the time I said that I learn the best by taking things apart and putting them back together again…well that’s exactly what I did here. Using the hundreds of photos I took during demo and keeping the old fabric scraps as semi-patterns. I slowly pieced this bad boy back together again, starting with the seat, then the (front part of?) the back, then the arms, then the (back part of?) the back. An excellent description, I know.

IMG_8399 IMG_8412
IMG_8416 IMG_8425

Chair_almost half way
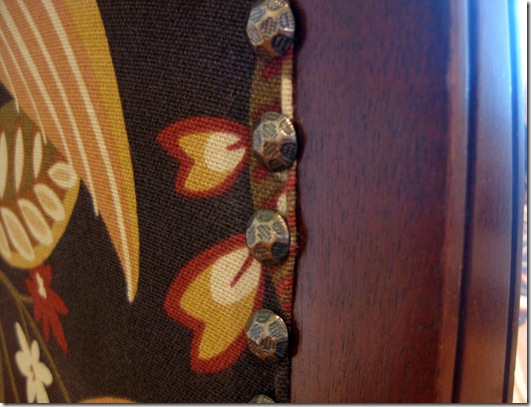
Once the seat and back were set, I used decorative nail heads to secure the arms.

Hint, hint: These guys are not the most durable. They bend, they break, and they will bring you to tears if you attempt to use a hammer alone. Use a drill bit one size smaller than your nail, and pre-drill your holes. Not only will the nails slide in easily with just a tap or two of the hammer but will be more evenly spaced and give a much cleaner finish.

IMG_8746

IMG_8763

IMG_8762

Once the finishing touches were set, I could check this bad boy off the Rehabilitation Station list!

IMG_8778IMG_8780 


I know this was the most pathetic excuse for a how-to ever to grace this little blog of mine, but I promise you friends, next time I tackle a full blown reupholstery rehab, a complete step-by-step how-to will be in tow. Hopefully this at gave you a smidge of a feel for how reupholstery works…and if not, at least I have a new chair out of the gig!

clip_image002

Read more...

5 True Confession: Mow Problems

>> Monday, May 2, 2011

Ready for a Monday morning true confession? This one is tough for me to admit, especially since I pride myself on being the best do-it-yourselfer that I can be, but not once in my entire DIY life have I ever learned how to use a lawnmower. I know. Disgrace.

After reflecting on my childhood, I blame my mother (sorry, ma). Every time she headed out to mow the lawn, it was ordered that we kiddos stay huddled inside for fear the lawnmower would kick up every pebble in the yard and rocket them directly into our corneas.

Further enabling my lack luster yard-work skills, I always had wonderfully helpful family and friends offering to do the job for me, but this weekend with my yard reaching the terrifyingly disgraceful point where I found myself flying into my carport and quickly running inside for fear disapproving neighbors would start throwing stones at the sight of me, my dependency was to be put to an end. I was going to mow that stinkin’ yard myself.


IMG_8796

Maybe I’m exaggerating the extent of the overgrowth? Let’s snoop a bit closer…

IMG_8793IMG_8797
There were no more excuses. Donated by my parents a couple of years back, this fella was about to get in on the action.

IMG_8802
…but with no owners manual and a plethora of scary all-caps danger signs, I felt the need for assistance. It is important that our fingers stay attached to our body after all.

IMG_8803 
Lawnmower go-to guru numero uno, Dad of course…but no answer. Mom? Straight to voicemail. Brother-in-law? At work, no response…Last resort: sister who I love dearly but is possibly hanging out in the shallow end of the DIY gene pool.


Jessica: Heeeeeeey! Whatcha doin?

Cara: Oh my goodness! You answered! I have a question and it’s starting to rain so I don’t have much time.

Jessica: Oh gosh, what is it?

Cara: Do you know how to start a lawnmower?

Jessica: silence

Cara: Jessica?


Needless to stay, I was not giving up on this one. For goodness sake, if I can perform full fledged open heart surgery on my hot water heater with great success, I could get this outdoor vacuum to cooperate.

All you have to do is pull that little cord right?…

…15 minutes later…

…push down the funny little bar, then pull the cord…

…10 minutes and a return phone call from Mom later…

…push the red button on the side 3 times, hold down bar, pull the cord with all your might…

…and away we go!

IMG_8804 IMG_8805


Note to self #1: The pit in your stomach after you get a haircut and realize how truly horrendous you looked before. Exact same feeling here.

imageimage

Note to self #2: Enormous backyards are great for slip-n-slides and terrier mixes. Lawn maintenance is a completely different story.

IMG_8807


clip_image002

Read more...

0 How-To: Arm Chair Rehab, Part 2

>> Wednesday, April 27, 2011

Alright! More on how we went from this tragedy…

Arm Chair_before
…to this lovely little companion.

IMG_8779 
Last I left you, the arm chair had been completely rid of the filthy blue fabric from its originally sad condition.

IMG_8455
As I confessed to you before, I don’t have a complete step by step how to for this project since it was mainly a let’s-wing-it-and-see-what-happens experiment. Bad Cara. I know. Moving on.

Once the chair was stripped to the bone, the next step was to add fresh new batting. Some of the original cushioning was in decent shape so I was able to reuse by covering with a thin layer of fresh batting. You can buy a decent sized roll in the fabric department of any craft store for around $10.00 or so.

IMG_8471
After unrolling and cutting the batting to fit over the different sections of the chair, I secured the batting to the underside of the chair with a staple gun. The best part about this step is you really don’t have to worry too much about how neat the staples look. All you really need to be concerned with is that the batting lays smoothly…

IMG_8477
Making a monster-sized mess seems to be a crucial part of the process…

IMG_8478
Stuffed and ready for fabric!

IMG_8479

clip_image002

Read more...

1 DIY: A Tree for Baby Evan

>> Tuesday, April 26, 2011

Rachel’s do-it-yourself tree decor for her little bun in the oven, Evan, is just about one of the cutest projects I’ve seen in a while. A super simple DIY weekend project, a big thanks to my sister for sending her buddy Rachel’s how-to pics my way.

Baby Tree_final
The finished product above, let’s discuss how you can whip up one of these bad boys for your little one.

First, Rachel sketched the outline for her tree on a piece of plywood and used a jig saw to cut her shape.

Baby Tree_1
Using the same sketch and cut method, leaves were created from the leftover scraps of wood…

Baby Tree_2
Rachel then covered the leaves with an assortment of fun fabrics…

Baby Tree_3
Once the trunk was painted and leaves assembled, baby Evan’s tree was ready to hang in his nursery. So cute, right?

Baby Tree_final

Great job, Rachel!.Let’s be honest. I’m dying over how stinkin’ adorable the little bird is perched on the top branch.

clip_image002

Read more...

0 Just Listed: 905 Karla Circle

>> Monday, April 25, 2011

Wonderfully updated 4 bedroom/3.5 bath home in Sherwood! New paint & crown moulding, two fireplaces, eat-in kitchen, separate dining room, and 2 car garage with tons of storage. Separate office/in-law quarters added to the rear of the home with kitchenette and large bathroom…doubles as the ultimate “man cave.”

Price: $194,900

905 Karla Circle_Front905 Karla Circle_Living_Dining905 Karla Circle_Living_1905 Karla Circle_Breakfast Room905 Karla Circle_Kitchen_1

905 Karla Circle_Kitchen_3

905 Karla Circle_Bar

905 Karla Circle_Master905 Karla Circle_Guestroom_1905 Karla Circle_Bonus Room_2905 Karla Circle_Deck_1
Click here for more photos and information on this newly listed home. Happy Monday!

clip_image002

Read more...
Related Posts with Thumbnails

  © Blogger template Simple n' Sweet by Ourblogtemplates.com 2009

Back to TOP