3 How To…Replace an Electrical Outlet

>> Wednesday, January 11, 2012

Note to the reader: Just to be on the safe side (and to protect my conscience from becoming overwhelmed with guilt when you electrocute yourself) no two houses are wired exactly the same and my experience with replacing outlets may not match up exactly to what needs to be done at your own construction site…now that we have that out of the way, let’s get down to DIY business.

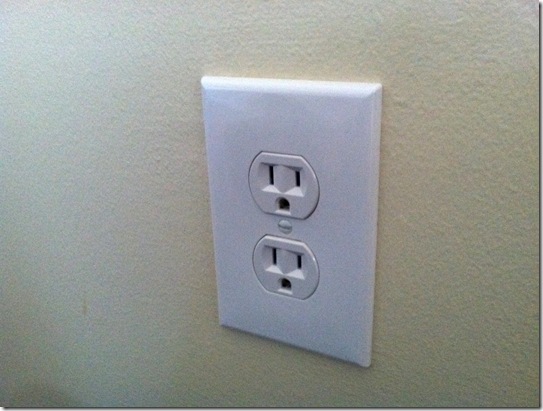
I wanted to replace all of the outlets in my house for a number of reasons, but mainly because they were all two prong outlets instead of three and most importantly, I was not a fan of the ancient manila hue. An unsightly hassle that needed to be corrected.

When I updated my bathrooms, I replaced the original electrical outlets with GFCI outlets (the funny looking ones with the red buttons) since building code require them in all wet areas, but for general around the house bedroom/bathroom/living room outlets, a simple switch with a 15 amp/125 volt receptacle should do the trick. If you are unsure which type of receptacle you need, take an old one into the hardware store and a friendly employee should be able to help you figure out exactly what you need.

How to Replace and Outlet_17

How to Replace and Outlet_16


Before I began, I turned off all of the electricity in my house. I’m a big chicken and don’t trust just turning off a breaker or two. Then using a volt tester, I double checked to make sure the outlets were not still live. Then, using a screwdriver, I removed the cover plate…

How to Replace and Outlet_2

How to Replace and Outlet_15


…and detached the old outlet from the electrical box inside the wall.

How to Replace and Outlet_13How to Replace and Outlet_4

Loosened the screws on either side of the outlet to release the wires…

How to Replace and Outlet_12

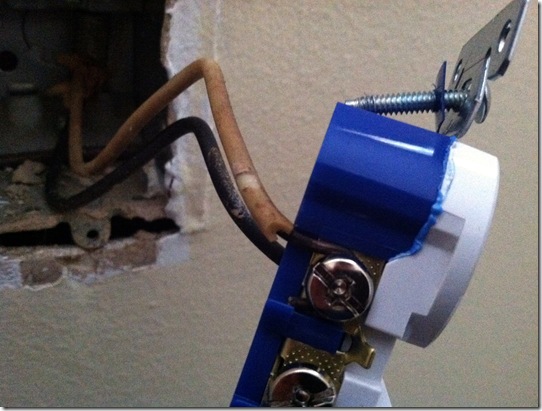
Newer outlets usually have instructions on the back outlining where the black (hot) and white (neutral) wires should be reattached.

How to Replace and Outlet_7

Loop the wires around their designated screw and tighten to secure into place.
How to Replace and Outlet_6How to Replace and Outlet_11

Then gently push the outlet back into place, reattach to the electrical box and secure the cover plate. Easy as pie and once you get the hang of it, this DIY shouldn’t take you more than a couple of minutes per outlet.
How to Replace and Outlet_5

But wait! What happens when you stumble across an outlet with not one but two white wires and two black wires? No worries. That’s why they give you two screws on each side of the outlet. Crisis averted.

How to Replace and Outlet_8How to Replace and Outlet_10


clip_image002

Read more...

0 Kitchen Cleanout

>> Tuesday, January 10, 2012

With a kitchen revamp in my near future, a necessary cabinet cleanout was eminent. Doing my best to plan ahead for the weeks to come, I’m trying to sort my kitchen gear into piles (and more piles) based on what I should keep, what I should toss, and what I will need to easily access during the remodel…so far the only item in the last category is my coffee pot. Sounds about right.

Kitchen Cleanout_1

Kitchen Cleanout_3

Kitchen Cleanout_2


clip_image002

Read more...

0 (More) Table Talk

>> Monday, January 9, 2012

Hands down, one of my favorite monthly reads is House Beautiful…and while it’s true that I’m hard pressed to find a home centered magazine I don’t like, this one is still a winner, with one of my favorite tidbits being the Send Us a Picture section where readers send in photos of what’s happening around their own casa. I absolutely love seeing the different styles of real people from all over the country and not just the fabulously facelifted concoctions of legit interior designers.

House Beautiful Table_4House Beautiful Table_3

This month’s Send Us a Picture was especially fun for my furniture flipping heart since it featured more than one rehabbed table that had been given new life…

House Beautiful Table_2House Beautiful Table_1

…Not to mention sent me straight down memory lane revisiting all of the rehabbed and repurposed tables laying around my own place.

IMG_5049

IMG_8317

Table_20

table_2


clip_image002

Read more...

0 What Where When Why…

>> Thursday, January 5, 2012

IMG_2110 

What: One last look at my kitchen in its before state.

Where: The happiest little construction site on earth.


When:
This morning.

Why: Architect dad approved my kitchen plans last night and gave me the thumbs up to start tearing it to pieces.


I’m loading up and heading to Dallas to watch the Razorbacks run away with the Cotton Bowl. Go Hogs and see you Monday!


clip_image002

Read more...

1 Ch-Ch-Ch-Ch Changes…

>> Wednesday, January 4, 2012

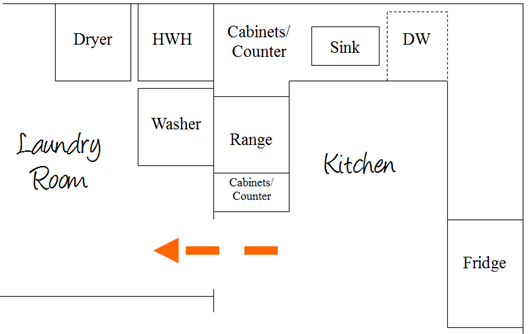
It’s amazing how one visit from a plumber can turn your entire construction site upside down and also prove the importance of planning ahead. During my plumber pal’s visit, it was decided that the best plan of action would be to move the planned doorway connecting my laundry room from here…

image 
…to here…

image

Fine by me since that was my original thinking when I signed my name on the dotted line and made this 1960s kitchen my very own two years ago…and not to mention this change will save me a penny or two when it comes to paying the cabinet fella, since he won’t have to build an entirely new chunk of cabinetry to house my range.

image

image


Goodness it feels good to inch my way closer to finalizing the layout for this kitchen/laundry room project! But just to make extra special sure I’m moving in the right direction, it’s time to bring in the big guns (in the form of my architect dad) to go over my game plan. Stay tuned. Hopefully my kitchen dreams will still be in tact.

clip_image002

Read more...

2 The Kitchen Plan, Stan: Take 1

>> Tuesday, January 3, 2012

If I’ve learned one thing as a Realtor, it’s that buyers prefer to buy houses where they don’t have to actually go outside to switch out a load of laundry. Unfortunately, my laundry room as is doesn’t quite fit the bill. In order to access my laundry room, I have to go out my kitchen door, into the carport and then into my laundry room like so…

image

A completely finished space in need of a little paint and polish, but entirely cut off from the rest of the house. To be a good Realtor and properly prep my house for resale down the road, it would be wise of me to go ahead and connect my kitchen and laundry room while I’m already getting down and dirty with a kitchen revamp.

image


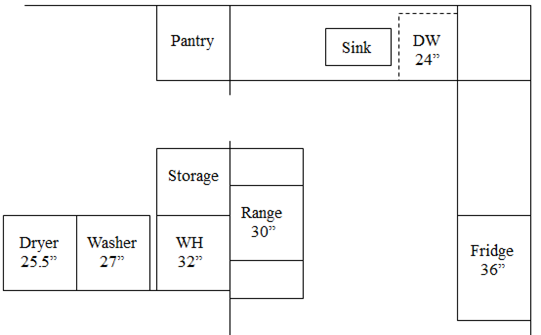
By taking out a few cabinets and flip-flopping my washer and dryer to the adjacent wall of my laundry room, there should be just enough room for a doorway. Should be. Fingers crossed.

image

image


clip_image002

Read more...

0 The Before Story: The Kitchen

>> Monday, January 2, 2012

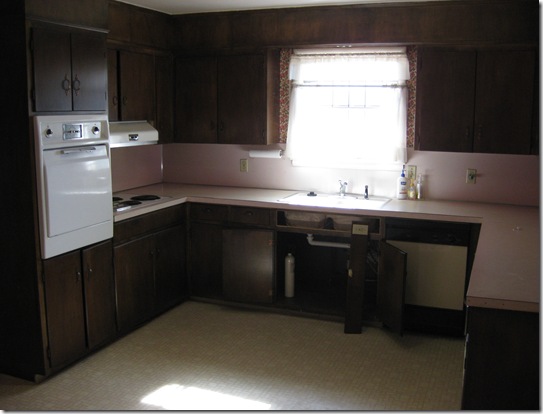
Happy New Year, y’all! Around these parts a new year brings a new project. It’s time to tackle this bad boy…

IMG_6845
IMG_3994

So what’s the plan? I’m still working on that part, but I do know the overall goal is to combine my kitchen and laundry room and rid this space of all traces of the 1960s. Here’s all I’ve had time to extract from my scattered DIY train of thought and throw down onto paper. I figure I’ll have plenty of time to think while I pack up dishes…

image


One thing is for sure. The next couple of months will be filled with saw dust and takeout and I could not be more excited.

clip_image002

Read more...
Related Posts with Thumbnails

  © Blogger template Simple n' Sweet by Ourblogtemplates.com 2009

Back to TOP